别着急,坐和放宽
前言
前一段时间从hexo换到了WordPress,用了一年最后换回了hexo。但hexo推送到服务器的步骤过于繁琐,于是我便写了一个工作流来自动化完成这一步骤
Github Action
GItHub Actions是一个持续集成和持续交付的平台,能够让你自动化你的编译、测试和部署流程。
GitHub 提供 Linux、Windows 和 macOS 虚拟机来运行您的工作流程,或者您可以在自己的数据中心或云基础架构中托管自己的自托管运行器
优点
- 可以多域名多站点部署
- 不会出现连接 github 连接不上的情况
- 可以自动部署完成
- 不再需要使用繁杂的命令
工作流
在这里分享一下我的工作流,平时写完文章以后,提交到仓库就会自动构建、更新 ,工作流部署后可使用GitHub Pages,netlify,vercel,cloudflare pages等,实现多线路多域名
前置
首先新建仓库A,用于一会儿hexo生成网页文件的存储仓库格式可以是 xxx.github.io,再新建仓库B(建议改为 私有)将博客源码上传至仓库
,找到Actions,点击"set up a workflow yourself "新建工作流

action
name: 自动部署
# 当有改动推送到main分支时启动Action
on:
  push:
    branches:
      - main
      #根据自己仓库的情况进行更改(源码在哪一分支就填哪个)
  release:
    types:
      - published

jobs:
  deploy:
    runs-on: ubuntu-latest
    steps:
      - name: 检查分支
        uses: actions/checkout@v2
        with:
          ref: main
          fetch-depth: 0
      - name: Sync local file timestamps
        run: |
          git ls-files -z | while read -d '' path; do touch -d $(git log -1 --format="@%ct" "$path") "$path"; done

      - name: 安装 Node
        uses: actions/setup-node@v1
        with:
          node-version: "16.x"

      - name: 安装 Hexo
        run: |
          export TZ='Asia/Shanghai'
          npm install hexo-cli -g

      - name: 缓存 Hexo
        id: cache-npm
        uses: actions/cache@v3
        env:
          cache-name: cache-node-modules
        with:
          path: node_modules
          key: ${{ runner.os }}-build-${{ env.cache-name }}-${{ hashFiles('**/package-lock.json') }}
          restore-keys: |
            ${{ runner.os }}-build-${{ env.cache-name }}-
            ${{ runner.os }}-build-
            ${{ runner.os }}-

      - name: 安装依赖
        if: ${{ steps.cache-npm.outputs.cache-hit != 'true' }}
        run: |
          npm install gulp-cli -g #全局安装gulp
          npm install --save

      - name: 生成静态文件
        run: |
          hexo clean
          hexo generate
          gulp


      - name: 部署到Github
        run: |
          cd ./public
          git init
          git config --global user.name "xxx"
          git config --global user.email "xxx@xxx.com"
          git add .
          git commit -m '${{ github.event.head_commit.message }}'
          git push --force --all https://user:token@github.com/user/user.github.io
- 注意!⚠️将 git config --global user.name "xxx"中的 xxx 替换为您的 GitHub 用户名(不是昵称)
- 注意!⚠️将 git config --global user.email "xxx@xxx.com"中的 xxx@xxx.com 替换为您的 GitHub
主邮箱 - 注意!⚠️ git push --force --all https://user:token@github.com/user/user.github.io 中 第一个 user 替换为您的用户名,token 替换为您的 GitHub token 如没有请在
设置页面中创建。 再将 github.com 后的user改为您的用户名,后面的user.github.io改为您将要存储博客网页的仓库名。
附加
添加屏蔽项
因为能够使用指令进行安装的内容不包括在需要提交的源码内,所有我们需要将这些内容添加到屏蔽项,表示不上传到 github 上。这样可以显著减少需要提交的文件量和加快提交速度。打开 .gitignore,(没有请创建)输入以下内容:
.DS_Store
Thumbs.db
db.json
*.log
node_modules/
public/
.deploy*/
.deploy_git*/
.idea
themes/butterfly/.git
最后一行要改成实际.git 的位置,因为我是 butterfly 主题,不同主题文件夹名字各不相同! 如果不是butterfly主题,记得替换最后一行内容为你自己当前使用的主题。
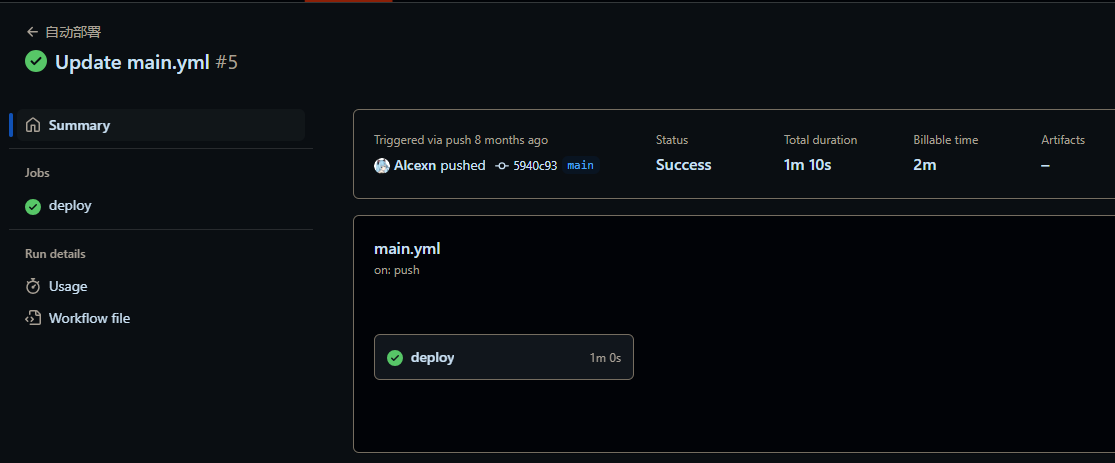
查看部署情况
打开 Github 存放源码的私有仓库,找到 action

02
03